投稿

2月, 2022の投稿を表示しています

Esp32, ssd1306, weather data display (No.4 )

Nowadays, the weather forecast became more accurate. You can search in the internet and get information. It is very nice. However, I thought it might be nicer if I have a display which tells the weather data.  I used website called open weather map. This is a little bit complicated project because involving request data, receive data and extract data.  The theory  So, the theory is esp32 request data to open weather map. Then open weather map send the data as Jason format. So, we extract the data we want from that format. Then we display the data to the organic LED display.  Necessary equipment 1. ESP32 ( WiFi module )  2. SSD1306 (Organic LED display )  Connection  ESP32 <---> SSD1306  3.3V <---> Vin GND <---> GND D22 <---> SCL  D21 <---> SDA Code #include <WiFiClient.h> #include <HTTPClient.h> #include <ArduinoJson.h> #include<Wire.h>             // #include<Adafruit_GFX.h>     //ダウンロードしたライブラリをインクルード #include<Adafruit_SSD

Arduino uno, dht11, ssd1306, humidity display (No.3)

 It is important to maintain the relative humidity in your room. It is said that maintaining 40~60% is good. If it`s too low, it will have some damage to your skin and your breathing. When it`s too high, there`s a higher the room might become moldy.  And there`s a relation between feels like temperature and the humidity. It says that as humidity rises 10%, the feels like temperature also rises around 1℃. It is because, when the humidity is high, the less water evaporate from your skin.  I installed this system because in winter the room tends to get dry, and made it as an indicator in order to humidify.  For more details, visit here.  https://www.christianhvac.com/blog/the-importance-of-a-humidifier-during-winter/ Let`s get into the project.  Materials  1. Arduino uno 2. dht11  3. ssd1306 Dht11 is a sensor that detects, relative humidity and temperature. I used ssd1306, it is called Organic LED display. It creates a beautiful color compare

Arduino Nano, LCD display 1602, bmp180, weather data display (No.2)

イメージ
 Welcome to my blog, this time I will show you my project which read the data of bmp180 sensor and display it to lcd display 1602. Let`s get into it.  Introduction  In the meteorology there`s high pressure and low pressure mass. Usually the weather is good when the pressure is high and when it`s low it is the opposite. Reading the air pressure declining or ascending is an important element in forecasting the weather.  Materials  Bmp180, arduino nano, LCD display 1602 Connection  Both connections are I2C.  bmp180  <---> arduino nano  VIN <---> 3.3V GND <---> GND SDA <---> A4 SCL <---> A5  And also,  LCD display <---> arduino nano  VIN <---> 5V  GND <---> GND  SDA <---> A4 SCL <---> A5 Coding  *Code may vary with what kind of library you use.  #include <Wire . h > #include <Adafruit _BMP085 . h > #include <LiquidCrystal _I2C . h > Adafruit_BMP085 bmp; // Set the LCD address to 0x27 for a 16 chars

ESP8266, BMP180, Blynk app, Weather staion (No.1)

イメージ
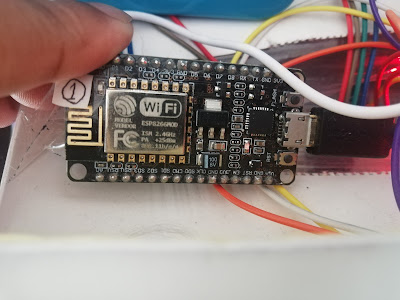
You might probably have seen weather application right? You can get the Temperature, humidity, air pressure and so on, however those readings are average value of a big area. So, installing this system, you will be able to read your room temperature and air pressure at any time through the blynk app. You can monitor the data any time from your phone c: Required components, 1. ESP8266 2. BMP180 *Blynk app and Arduino IDE software is required What is ESP8266? ESP8266 is a low-cost WiFi microchip produced by Espressif Systems in Shanghai, China. And it has a C++ based firmware which make it possible to program like any other Arduino device. About BMP180 It is a sensor that you can detect air pressure and temperature. It is designed to be connected via I2C bus. Connectivity BMP180 <--> ESP8266 VIN <------> 3.3V GND <------> GND SCL <------> D1 SDA <-----

Weather station

イメージ
  My weather station was born in 2021 late in the April. And also added more functions on the late of October.  It had many many obstacles which (almost) broke my heart. haha  I was in a  beginner with programming and I had to deal with a lot of errors, but I didn`t give up on my dream to monitor my temperature at home by simple app. Is that really necessary for me to monitor my room temperature by app? I don`t know. I just thought it`s fun.  There are four functions ,  No. 1 is weather data transmitter.           -  ESP8266          -  BMP 180 No.2 is air pressure display          - lcd display 16x2          - bmp180  No.3 Humidity display           - dht11          - ssd1306 No. 4 weather data display          - ssd1306         - esp32  Those are the function and the components that I used. Maybe I can share about these four projects to you if you are interested.  I`m bad at writing, but I hope you enjoyed :)  And please let me know your opinions by the comment section c: