ESP8266, BMP180, Blynk app, Weather staion (No.1)
You might probably have seen weather application right? You can get the Temperature, humidity, air pressure and so on, however those readings are average value of a big area. So, installing this system, you will be able to read your room temperature and air pressure at any time through the blynk app. You can monitor the data any time from your phone c:
Required components,
1. ESP8266
2. BMP180
*Blynk app and Arduino IDE software is required
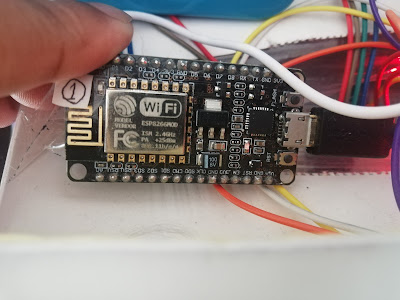
What is ESP8266?
ESP8266 is a low-cost WiFi microchip produced by Espressif Systems in Shanghai, China. And it has a C++ based firmware which make it possible to program like any other Arduino device.
About BMP180
It is a sensor that you can detect air pressure and temperature. It is designed to be connected via I2C bus.

Connectivity
BMP180 <--> ESP8266
VIN <------> 3.3V
GND <------> GND
SCL <------> D1
SDA <-------> D2
What is Blynk?
Blynk is a Platform with iOS and Android apps to control Arduino, Raspberry Pi and the likes over the Internet.
It`s a digital dashboard where you can build a graphic interface for your project by simply dragging and dropping widgets.
To set up Blynk app, go to
https://docs.blynk.cc/
Coding
okay, once you checked your connection, now you can do the programming. Connect your ESP8266 through USB and open Arduino IDE. You have to download library of BMP180.
Select the port and see if the code runs without error.
Download and include library,
ESP8266WiFi.h
BlynkSimpleEsp8266.h
Adafruit_BMP085.h


#define BLYNK_PRINT Serial    // Comment this out to disable prints and save space
#include <ESP8266WiFi.h>
#include <BlynkSimpleEsp8266.h>


#include <Wire.h>
#include <Adafruit_BMP085.h>


// You should get Auth Token in the Blynk App.
// Go to the Project Settings (nut icon).
char auth[] = "Your Auto token of blynk";  // Put your Auth Token here.

BlynkTimer timer;

#define I2C_SCL 5     // Barometric Pressure Sensor (BMP085)
#define I2C_SDA 4
Adafruit_BMP085 bmp;

float dst,bt,bp,ba;
char dstmp[20],btmp[20],bprs[20],balt[20];
bool bmp085_present=true;

void setup()
{
  Serial.begin(9600); // See the connection status in Serial Monitor
   Blynk.begin(auth, "putSSIDhere", "putpasswordhere"); //insert here your SSID and password

 Wire.begin(I2C_SDA, I2C_SCL);
  delay(10);
if (!bmp.begin()) {
  Serial.println("Could not find a valid BMP085 sensor, check wiring!");
  while (1) {}
  }


  // Setup a function to be called every second
  timer.setInterval(10000L, sendUptime);
}

void sendUptime()
{
  // You can send any value at any time.
  // Please don't send more that 10 values per second.
   //Read the Temp and Humidity from DHT

  float bp =  bmp.readPressure();
  Blynk.virtualWrite(10, bp); // virtual pin

  float ba =  bmp.readAltitude();
  Blynk.virtualWrite(11, ba); // virtual pin

  float bt =  bmp.readTemperature();
  Blynk.virtualWrite(12, bt); // virtual pin

    float dst =  bmp.readSealevelPressure();
  Blynk.virtualWrite(13, dst); // virtual pin

}

void loop()
{

 Serial.print("Temperature = ");
    Serial.print(bmp.readTemperature());
    Serial.println(" *C");

    Serial.print("Pressure = ");
    Serial.print(bmp.readPressure());
    Serial.println(" Pa");

    // Calculate altitude assuming 'standard' barometric
    // pressure of 1013.25 millibar = 101325 Pascal
    Serial.print("Altitude = ");
    Serial.print(bmp.readAltitude());
    Serial.println(" meters");

    Serial.print("Pressure at sealevel (calculated) = ");
    Serial.print(bmp.readSealevelPressure());
    Serial.println(" Pa");


    Serial.println();
    delay(500);


  Blynk.run();
  timer.run();
}

コメント
コメントを投稿